
Speeding Up Your Laravel Site’s Images with DigitalOcean CDN
TLDR;
In this post we’ll go over how to store and serve your Laravel site’s images using DigitalOcean Spaces and their built-in CDN. We’ll create the bucket, connect Laravel’s filesystem to it, set up a custom CDN subdomain so that the URLs look pretty (e.g. images.your-domain.com). As a bonus we’ll quickly cover how you can convert your images to WebP via the CLI (Mac version) for even smaller file sizes.
1. Why Use a CDN to Deliver Your Images
Adding a cloud-based file storage system like DigitalOcean Spaces or Amazon S3 Buckets is a great way to store and serve images for your Laravel app. This modern "serverless" approach is much better than serving images directly from your main web server. But even if you serve those images directly from a bucket, every request still has to travel to the single region where that bucket lives. If visitors live far away from that location then they'll experience slower load times than someone closer by.
A Content Delivery Network (CDN) helps by caching your images on multiple edge servers around the world. When someone visits your site, the image is served from the closest location to them instead of making the long trip to your origin bucket. This means faster load times and better performance / SEO for your site.
2. Creating a Spaces Bucket in DigitalOcean
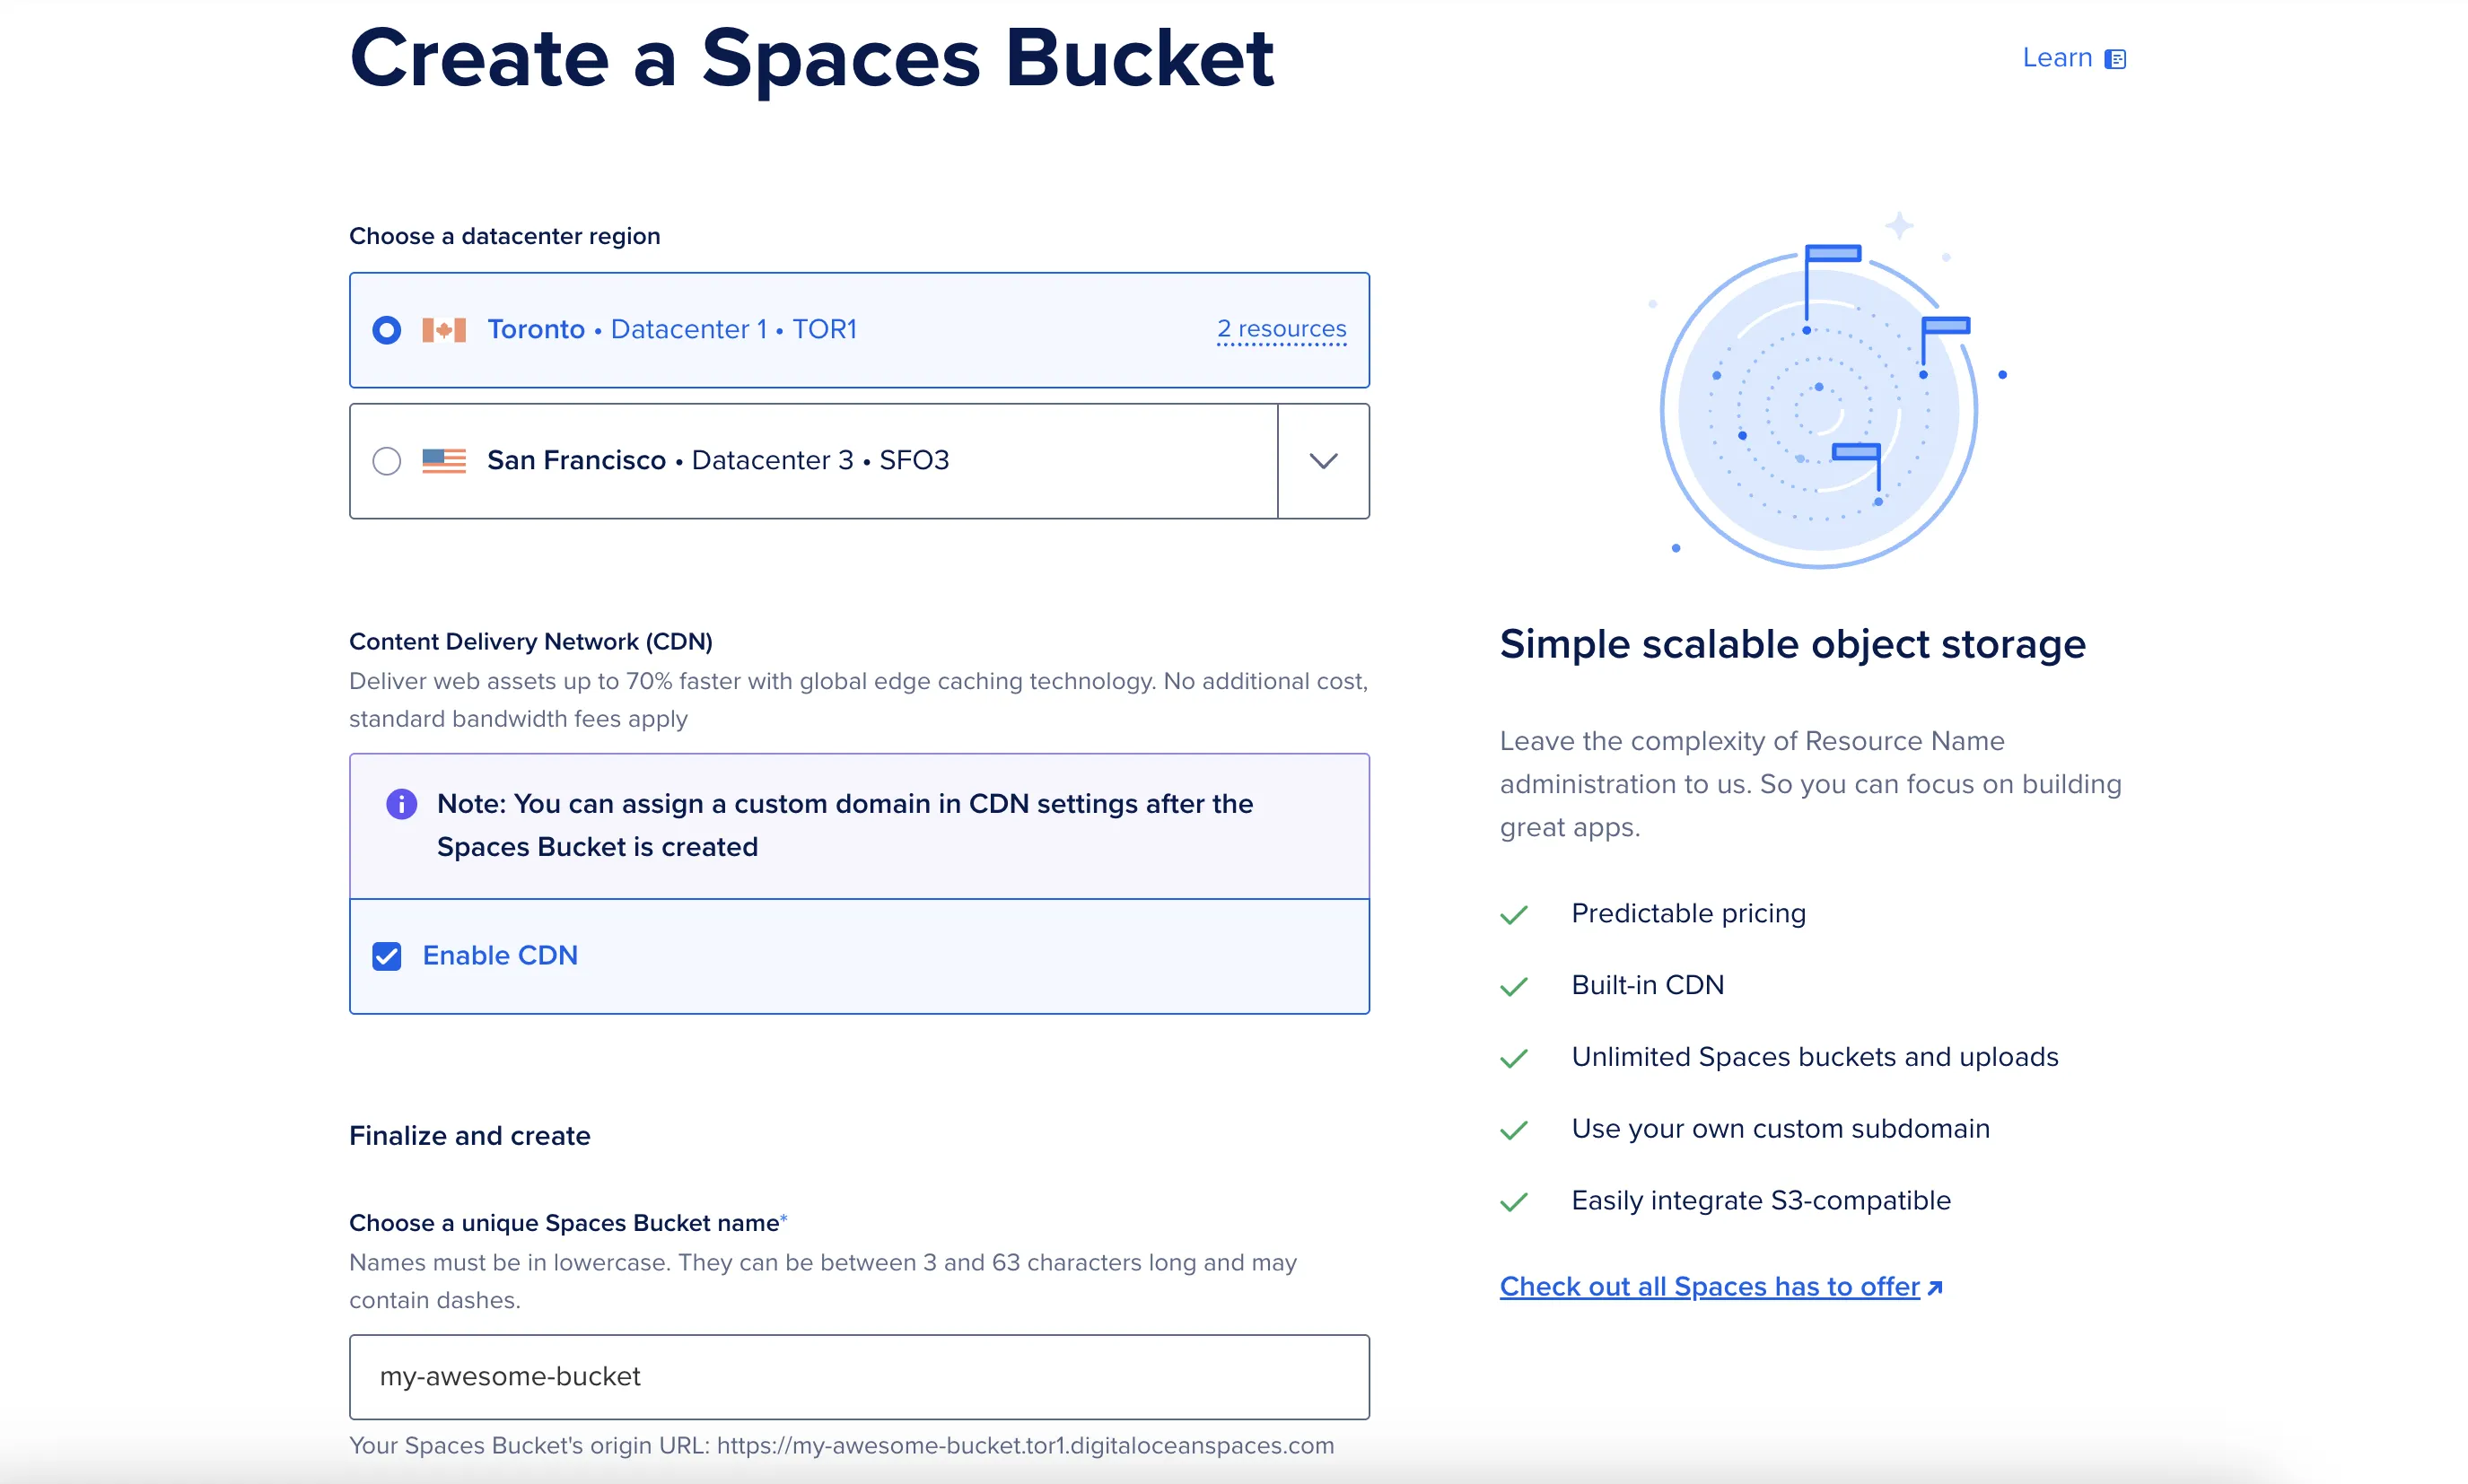
The first step is to log in to your DigitalOcean account and create a new Space. Choose the region closest to your audience. In this example I’m using tor1.
Note the Enable CDN option is also checked which will come in handy further down.
Once created, you can grab your Spaces access key and secret key provided on screen. Note the secret key is typically only shown once for security reasons.
3. Configuring Laravel’s Filesystem for S3-Compatible Storage
DigitalOcean Spaces uses the S3 API, so we can use Laravel’s S3 filesystem driver. First, install the AWS S3 Flysystem package if you don’t already have it:
composer require league/flysystem-aws-s3-v3 "^3.0" --with-all-dependenciesNext open up config/filesystems.php and add a new disk config for DigitalOcean:
// config/filesystems.php

'do' => [
    'driver' => 's3',
    'key' => env('DO_SPACES_KEY'),
    'secret' => env('DO_SPACES_SECRET'),
    'region' => env('DO_SPACES_REGION'),
    'bucket' => env('DO_SPACES_BUCKET'),
    'url' => env('DO_SPACES_URL'),
    'endpoint' => env('DO_SPACES_ENDPOINT'),
    'use_path_style_endpoint' => env('DO_SPACES_USE_PATH_STYLE_ENDPOINT', false),
    'throw' => false,
    'report' => false,
    'bucket_endpoint' => true,
],
Then update your .env file with your actual keys, bucket name, region, and endpoint URLs (replacing my-awesome-bucket with your actual bucket name):
DO_SPACES_KEY=
DO_SPACES_SECRET=
DO_SPACES_REGION=tor1
DO_SPACES_BUCKET=my-awesome-bucket
DO_SPACES_ENDPOINT=https://my-awesome-bucket.tor1.digitaloceanspaces.com
DO_SPACES_URL=
DO_SPACES_USE_PATH_STYLE_ENDPOINT=false
With that in place, you can use the do disk anywhere in Laravel like so:
Storage::disk('do')->put('example.jpg', $fileContents);4. Setting Up a Custom CDN Subdomain for Your Images
Technically we've already done the leg work to allow our Laravel site to leverage DigitalOcean's built-in CDN. DigitalOcean provides their own ready-to-use CDN endpoint to help you get up and running quickly.
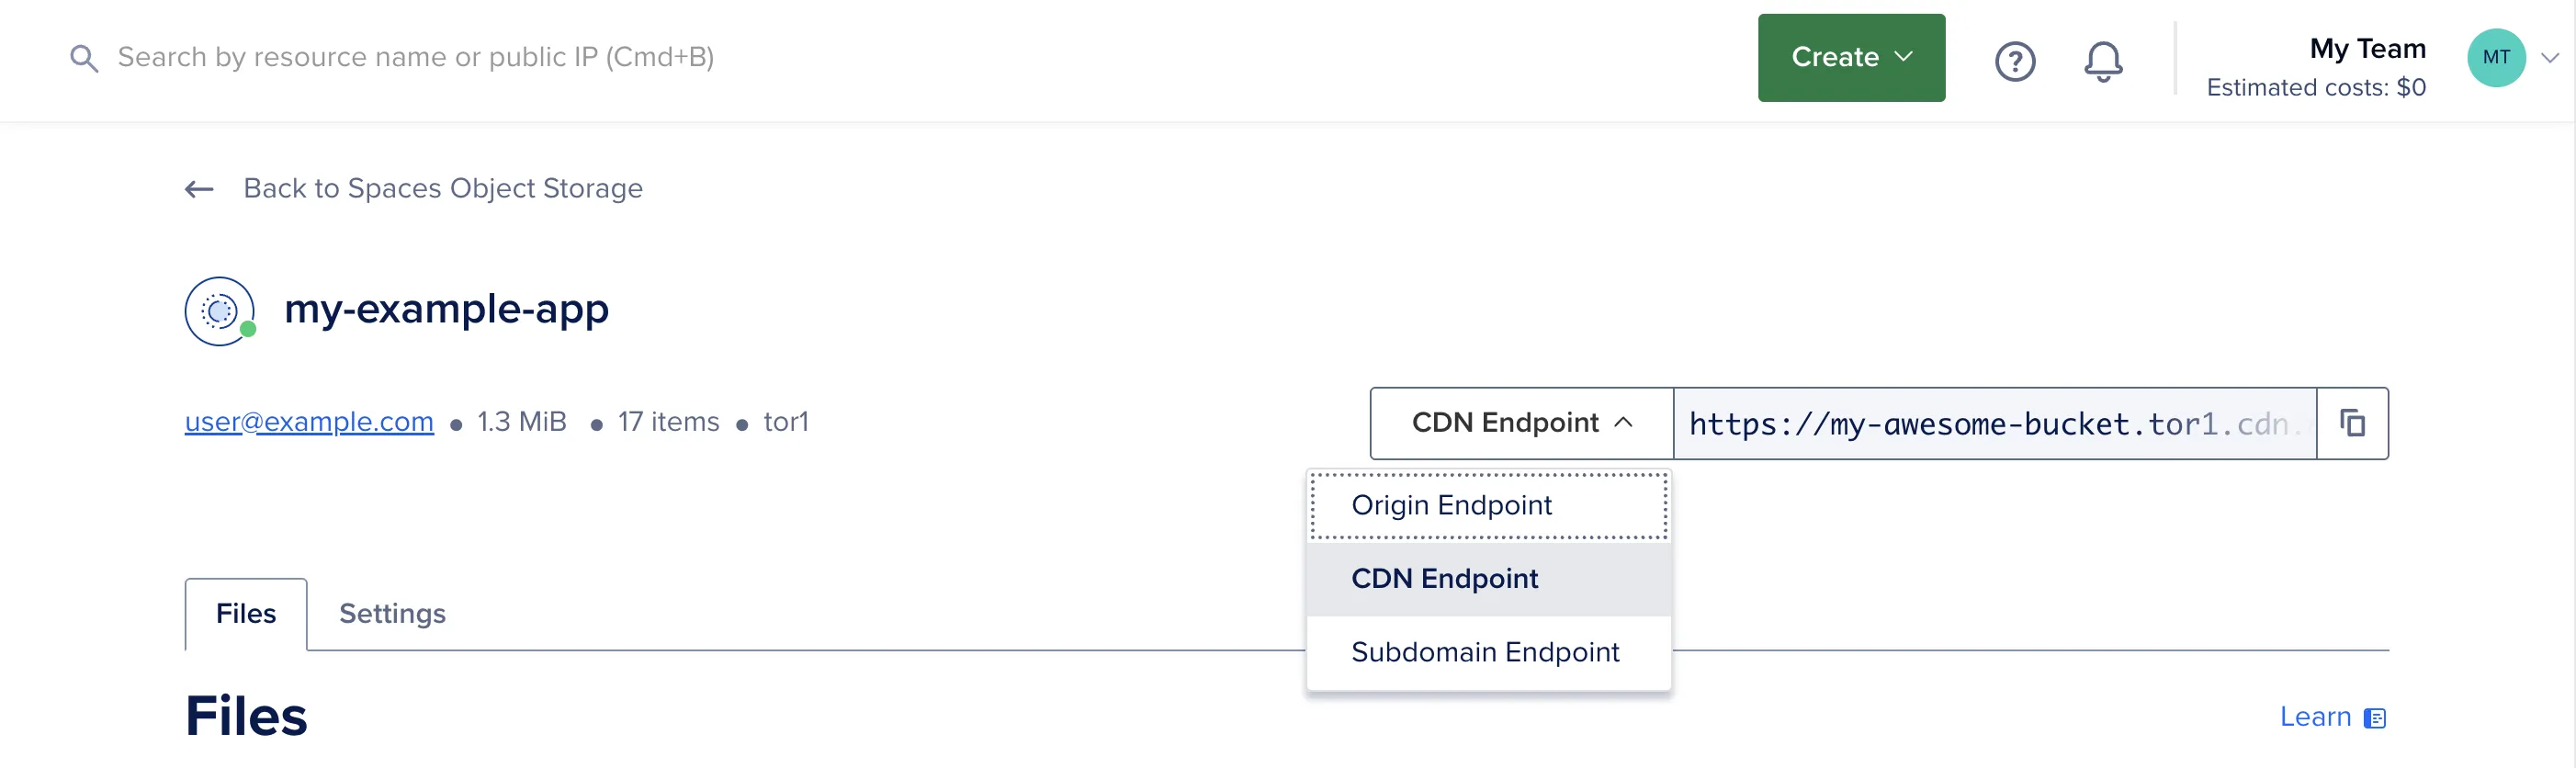
To get it working all you have to do is copy the CDN endpoint from their dashboard and then update your DO_SPACES_URL environment variable. For example:
DO_SPACES_URL=https://my-awesome-bucket.tor1.cdn.digitaloceanspaces.comThis is already much better than serving images directly from our source bucket, however a clean custom branded image subdomain like images.your-domain.com would be even nicer.
The easiest way to accomplish this is if you're already using DigitalOcean to manage your DNS records (your domain's nameservers are pointing to their official ones). This is because you'll need to add an SSL certificate to keep things secure when using a custom subdomain. In that case you can simply follow the on screen instructions to generate a free managed SSL certificate using their Let's Encrypt integration.
Once that's provisioned, you can update your .env to use your custom image subdomain:
DO_SPACES_URL=https://images.your-domain.comAlternatively, if you're using another service to manage your DNS records (such as your domain registrar) and do not wish to migrate all your DNS records over to DigitalOcean, they do provide a "Bring Your Own Certificate" option. Personally I haven't tried it, but if you know what you're doing here, the manual method is available for you.
Anywhoo it's now time to fire up your browser and test it out! 🎉
Simply add an image to your Spaces bucket and try to access it via your custom subdomain, e.g:
https://images.your-domain.com/hello-world.jpg
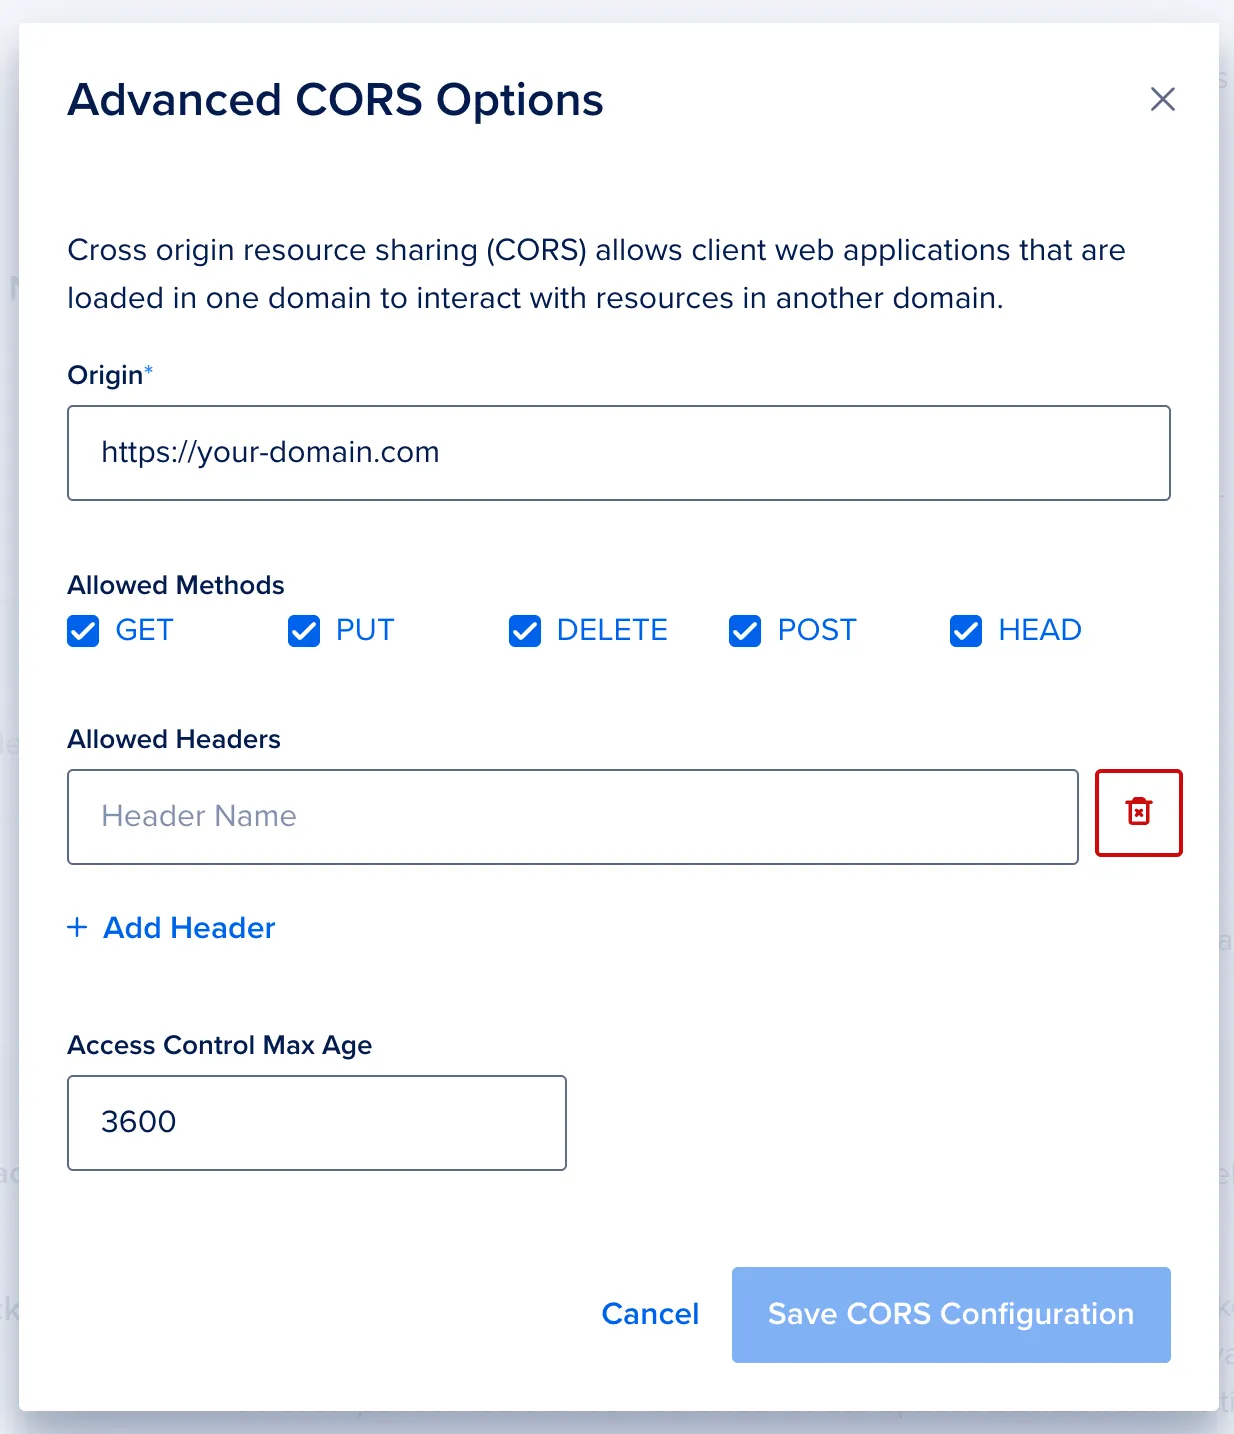
Note: If you run into any issues accessing the image, it may be because you need to configure CORS to allow your domain to access the Spaces bucket. You can specify exactly which HTTP methods and headers to add. The allowed headers field also accepts wildcards.
And that's it! Hopefully this helped save you some time setting up a CDN for your images.